Whether you’re a seasoned urban gardener or just starting out, learning how to propagate your own plants can be both rewarding and cost-effective. In this article, we will explore various do-it-yourself (DIY) plant propagation techniques that are perfect for urban gardeners. From stem cuttings to division and layering, we will provide step-by-step instructions and tips to help you successfully expand your garden without breaking the bank. So, grab your gardening gloves and get ready to unlock the secrets of propagation and watch your urban oasis flourish.

Why propagate plants?
The benefits of plant propagation
Plant propagation is a valuable technique that allows you to grow new plants from existing ones. Not only does it provide countless benefits for urban gardeners, but it also opens up a whole new world of possibilities for green-thumbed enthusiasts. By propagating plants, you can save money on buying new plants, expand your garden without purchasing additional ones, and enjoy the satisfaction of seeing your own plants thrive.
Saving money on new plants
One of the primary advantages of plant propagation is its cost-effectiveness. Instead of constantly purchasing new plants from nurseries or garden centers, propagating your own plants allows you to grow numerous new ones at little to no cost. Whether you’re looking to add more greenery to your urban garden or share plants with friends and neighbors, plant propagation can save you a significant amount of money in the long run.
Expanding your garden without purchasing additional plants
Urban gardening often comes with limitations such as limited space or budget constraints. However, plant propagation offers a solution to these challenges. Instead of purchasing additional plants to expand your garden, you can simply propagate from your existing plants. This not only allows you to maximize your garden space but also helps create a harmonious and cohesive garden design by expanding on the plants you already have.
Understanding plant propagation
What is plant propagation?
Plant propagation is the process of creating new plants from various plant parts, such as seeds, stems, leaves, divisions, layering, grafting, and tissue culture. It is a natural phenomenon that plants use to reproduce and spread in the wild. By understanding the different methods of plant propagation, you can harness this process effectively in your own garden.
The different methods of plant propagation
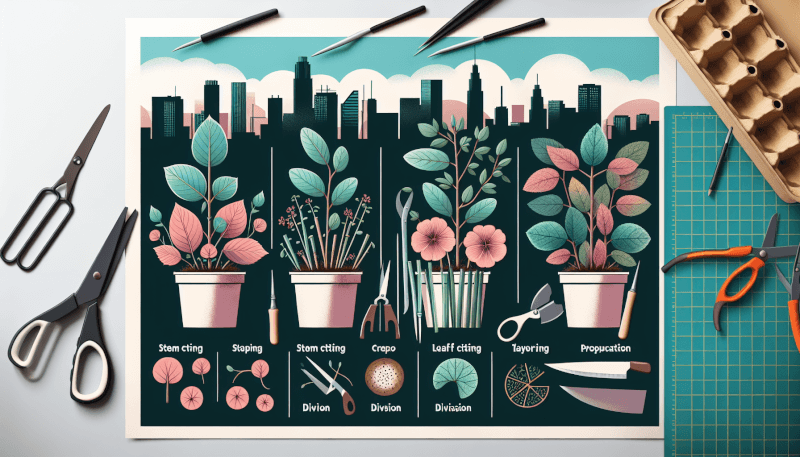
There are several methods of plant propagation that urban gardeners can explore. Each method is suited for different types of plants, and mastering these techniques will allow you to propagate a wide variety of plants successfully. The methods include propagation by seed, stem cutting propagation, leaf cutting propagation, division propagation, layering propagation, grafting propagation, and tissue culture propagation. Each technique has its own advantages and considerations, making it essential to choose the right method for your specific plants.
Choosing the right method for your plants
When deciding on the appropriate propagation method for your plants, several factors come into play. Consider the type of plant you want to propagate, its growth habits, and the time and resources you have available. Some plants may be better suited for propagation by seed, while others thrive through stem cuttings or division. By understanding your plants’ specific needs and characteristics, you can choose the propagation method that is most likely to yield successful results.
1. Propagation by seed
Collecting and saving seeds
Propagation by seed is one of the most common and straightforward methods. Start by collecting seeds from mature plants that you want to propagate. Allow the seeds to fully mature and dry before removing them from the plant. Store the seeds in a dry and cool place until you are ready to germinate them.
Germinating seeds
To germinate seeds, create a suitable environment that provides moisture and warmth. This can be achieved by sowing the seeds directly into a seed tray or pot filled with fertile soil or using seed trays with individual compartments. Ensure the soil is consistently moist and place the tray in a warm location with access to natural light. Regularly monitor the moisture levels and adjust accordingly.
Transplanting seedlings
Once the seedlings have developed sufficient roots and are strong enough to withstand transplanting, carefully remove them from the seed tray and transfer them into individual pots or directly into your garden. Ensure that the soil in the new location is well-drained and enriched with nutrients. Water the transplanted seedlings thoroughly and monitor their growth as they establish themselves in their new environment.
2. Stem cutting propagation
Selecting healthy stems for propagation
Stem cutting propagation is a popular method for many plants, including herbs, shrubs, and houseplants. Select healthy stems from the parent plant that exhibit vigorous growth and have not yet flowered. Choose stems that are approximately 4-6 inches long and free from any signs of disease or damage.
Preparing cutting tools and materials
Before taking stem cuttings, ensure that your cutting tools are clean and sharp to minimize damage to the stems. Use clean pruning shears or a sharp knife to make a clean and angled cut just below a leaf node. Remove any leaves from the lower portion of the stem, leaving only a few leaves at the top.
Rooting hormone application
To enhance the success rate of rooting, many gardeners choose to apply a rooting hormone to the cut end of the stem. Rooting hormones contain plant growth regulators that stimulate root development. Dip the cut end of the stem into the rooting hormone, ensuring full coverage, and gently tap off any excess powder.
Planting the stem cuttings
Prepare a well-draining rooting medium, such as a mixture of perlite and peat moss or a commercial seed-starting mix. Insert the treated end of the stem cuttings into the rooting medium, ensuring they are planted deep enough to provide stability. Place the tray or pot in a warm and brightly lit location, but avoid direct sunlight. Maintain the moisture levels by misting the cuttings regularly and ensuring the rooting medium remains moist but not waterlogged.

3. Leaf cutting propagation
Choosing suitable plants for leaf cutting propagation
Leaf cutting propagation is an exciting method of propagation that works well for certain plants, such as succulents and some flowering ornamentals. Select plants that have mature leaves with no signs of disease or damage. Avoid using leaves that are too old or too young for optimal success.
Taking leaf cuttings
Gently remove a healthy leaf from the parent plant by carefully gripping the base of the leaf and gently twisting it. Ensure that a small section of the leaf’s stem, called the petiole, remains attached. It is essential to avoid tearing or damaging the leaf in the process. If the leaf is large, you can cut it into sections, ensuring each section has a part of the petiole attached.
Preparing a suitable rooting medium
For leaf cutting propagation, a well-draining rooting medium is crucial. A mixture of perlite and peat moss or a commercial succulent/cacti mix is ideal. Fill a tray or pot with the rooting medium, ensuring it is evenly moist but not waterlogged.
Leaf propagation in water or soil
Once you have prepared the rooting medium, gently insert the leaf cuttings into the medium. For some plants, like succulents, you can also propagate leaves by placing them directly on top of the soil without burying them. Place the tray or pot in a warm and well-lit area, ensuring it receives indirect sunlight. Regulate the moisture levels by misting the cuttings or adding water to the tray as needed. Over time, new roots and shoots will emerge from the base of the leaf, indicating successful propagation.
4. Division propagation
Identifying plants suitable for division
Division propagation is a common method used for plants that grow in clumps or have multiple stems arising from a central crown. Examples include perennials like hostas, ornamental grasses, and daylilies. Choose plants that have become overcrowded or have outgrown their current space to ensure successful division.
Preparing the plant for division
Before dividing the plant, water it thoroughly to make the soil moist and easier to work with. Carefully dig around the clump of the plant, ensuring you preserve as much of the root system as possible. Lift the plant out of the ground, gently shaking off excess soil to expose the roots.
Dividing the plant
Divide the plant into sections by carefully separating the clump into smaller parts. Use your hands, a clean pruning saw, or a sharp knife to divide the clump, ensuring that each section has a healthy amount of roots and shoots. Trim away any damaged or diseased parts, and ensure that each division is viable and capable of sustaining itself.
Transplanting divided sections
Once divided, transplant each section into individual pots or directly into your garden. Ensure the soil is well-drained and nutrient-rich, providing the newly divided sections with an optimal environment for growth. Water the transplanted divisions thoroughly and continue to monitor their progress as they establish themselves in their new locations.

5. Layering propagation
Types of layering: air layering and ground layering
Layering propagation is a technique that involves encouraging a branch or stem of a plant to develop roots while still attached to the parent plant. There are two primary types of layering: air layering and ground layering.
Air layering is suitable for plants that have flexible branches or stems that can be bent and remain in contact with the parent plant. Ground layering is best suited for plants that exhibit low-lying branches that naturally root to the ground.
Selecting the right branches for layering
Choose a healthy and vigorous branch or stem that is close to the ground or easily accessible for air layering. Look for branches that are not woody or too young, as these may have lower success rates.
Preparing the branch for layering
For air layering, make a small upward cut about halfway through the branch where you want the roots to form. Apply a rooting hormone to the exposed area to promote root development. Cover the wound with moist sphagnum moss, ensuring it is securely held in place using plastic wrap or a similar material.
For ground layering, gently bend the selected branch or stem to the ground, ensuring it remains in contact with the soil. Make a small incision in the bark where the branch touches the ground, applying rooting hormone if desired. Cover the incision with soil, ensuring good contact for root development.
Enclosing and rooting the layered section
For air layering, wrap the plastic wrap tightly around the moss-covered area, ensuring it is sealed and no air can enter. This creates a moist and humid environment, ideal for root development. Regularly check the moisture levels and mist if necessary.
For ground layering, secure the branch or stem in place using stakes or rocks to ensure it remains in contact with the soil. This ensures consistent moisture and contact for root development. Monitor the branch periodically to ensure it remains healthy and that roots are developing.
6. Grafting propagation
Understanding grafting and its purpose
Grafting propagation is a technique where two plants from the same species or closely related species are joined together to create a new plant. This method is commonly used to combine desirable traits from different plants onto a single plant, resulting in a stronger, more productive, or disease-resistant plant.
Selecting the right rootstock and scion
Grafting involves selecting a rootstock, which is the lower portion of the graft, and a scion, which is the upper portion. The rootstock is typically chosen for its desirable root system and vigor, while the scion is chosen for its desirable traits such as fruitfulness or flower color. It is essential to choose compatible plants to ensure successful grafting.
Preparing the grafting tools
Clean and sterilize your grafting tools, such as a sharp knife or grafting shears, to minimize the risk of transmitting diseases. Ensure the tools are sharp to make clean and precise cuts during the grafting process.
Performing the grafting process
There are several grafting techniques, including whip-and-tongue grafting, cleft grafting, and bud grafting. The specific technique will depend on the plants you are grafting and personal preference. It is crucial to follow the appropriate technique’s detailed instructions to ensure a successful graft.
Caring for the grafted plant
After grafting, protect the graft union by using grafting tape or a similar material to secure and cover the area. This provides support and protection while allowing the graft to heal. Place the grafted plant in a warm and well-lit area, ensuring it has access to adequate water and nutrients. Monitor the plant closely for signs of stress or disease and provide any necessary care to ensure its successful growth.

7. Tissue culture propagation
What is tissue culture propagation?
Tissue culture propagation, also known as micropropagation, is a method that involves growing plant cells or tissues in a controlled environment, such as a laboratory. It allows for the rapid production of large quantities of genetically identical plants. This technique is often used for rare or endangered species, as well as for producing disease-free plants.
The benefits and challenges of tissue culture
Tissue culture offers several advantages, such as the ability to propagate a large number of plants in a relatively short period, the production of disease-free plants, and the preservation of rare or endangered species. However, it requires specialized equipment, skills, and a sterile environment, making it more challenging for the average gardener to perform at home.
Obtaining plant tissues for culture
To initiate tissue culture propagation, plant tissues such as leaves, stems, or meristematic cells are collected from the parent plant. Careful attention must be given to ensure the plant tissues are healthy and free from disease or contamination. The tissues are then sterilized to remove any microorganisms or fungi that could hinder the success of the tissue culture.
The process of tissue culture propagation
The sterilized plant tissues are placed in a nutrient-rich agar-based medium containing essential nutrients and growth hormones. The tissues are carefully monitored and grown under specific conditions of temperature, light, and humidity. Over time, the tissues develop into new shoots or plantlets that can be transferred to a growing medium for further growth and development.
9. Care and maintenance of propagated plants
Providing adequate light and water
Proper care and maintenance are crucial for the successful growth of propagated plants. Provide your propagated plants with adequate light, ensuring they receive the appropriate amount of sunlight based on their specific needs. Water your plants regularly, making sure the soil is evenly moist but not waterlogged. Adjust the watering schedule based on the plant’s individual requirements.
Fertilizing propagated plants
As your propagated plants grow, they will require nutrients to support their development. Consider using a balanced slow-release fertilizer or a diluted liquid fertilizer to provide essential nutrients. Follow the manufacturer’s instructions for the appropriate application rate and frequency. Be cautious not to over-fertilize, as this can lead to nutrient imbalances and potentially harm your plants.
Monitoring for signs of stress or disease
Regularly monitor your propagated plants for signs of stress, disease, or pest infestations. Look for yellowing leaves, wilting, discoloration, or any unusual symptoms. Promptly address any issues by adjusting watering practices, providing appropriate care, or treating pests or diseases with organic or chemical interventions, depending on your gardening preferences.
Tips for successful plant care
To ensure the success of your propagated plants, here are some additional tips:
- Remember to label your propagated plants to avoid confusion later on.
- Provide adequate airflow and ventilation to prevent the buildup of moisture and the growth of fungal diseases.
- Gradually acclimate your propagated plants to outdoor conditions if you plan to transplant them outside.
- Monitor the temperature and humidity levels in your growing environment to ensure they remain within optimal ranges.
- Seek advice or guidance from experienced gardeners or plant enthusiasts if you encounter difficulties or have specific questions about caring for your propagated plants.
By mastering the various methods of plant propagation and providing proper care, you can enjoy the rewards of seeing your plants thrive and fill your urban garden with natural beauty. With a little time, effort, and enthusiasm, you can become a skilled plant propagator and continue to expand your garden with an endless array of new and thriving plants. Happy propagating!

